Friday, October 12, 2012

Stamp a Tangle

I wasn't sure what to call this, Reverse Zentangle?  Untangle?  Finally decided on Stamp a Tangle because instead of drawing tangle patterns, I got patterns from my stamps.

My Stamped Tangle

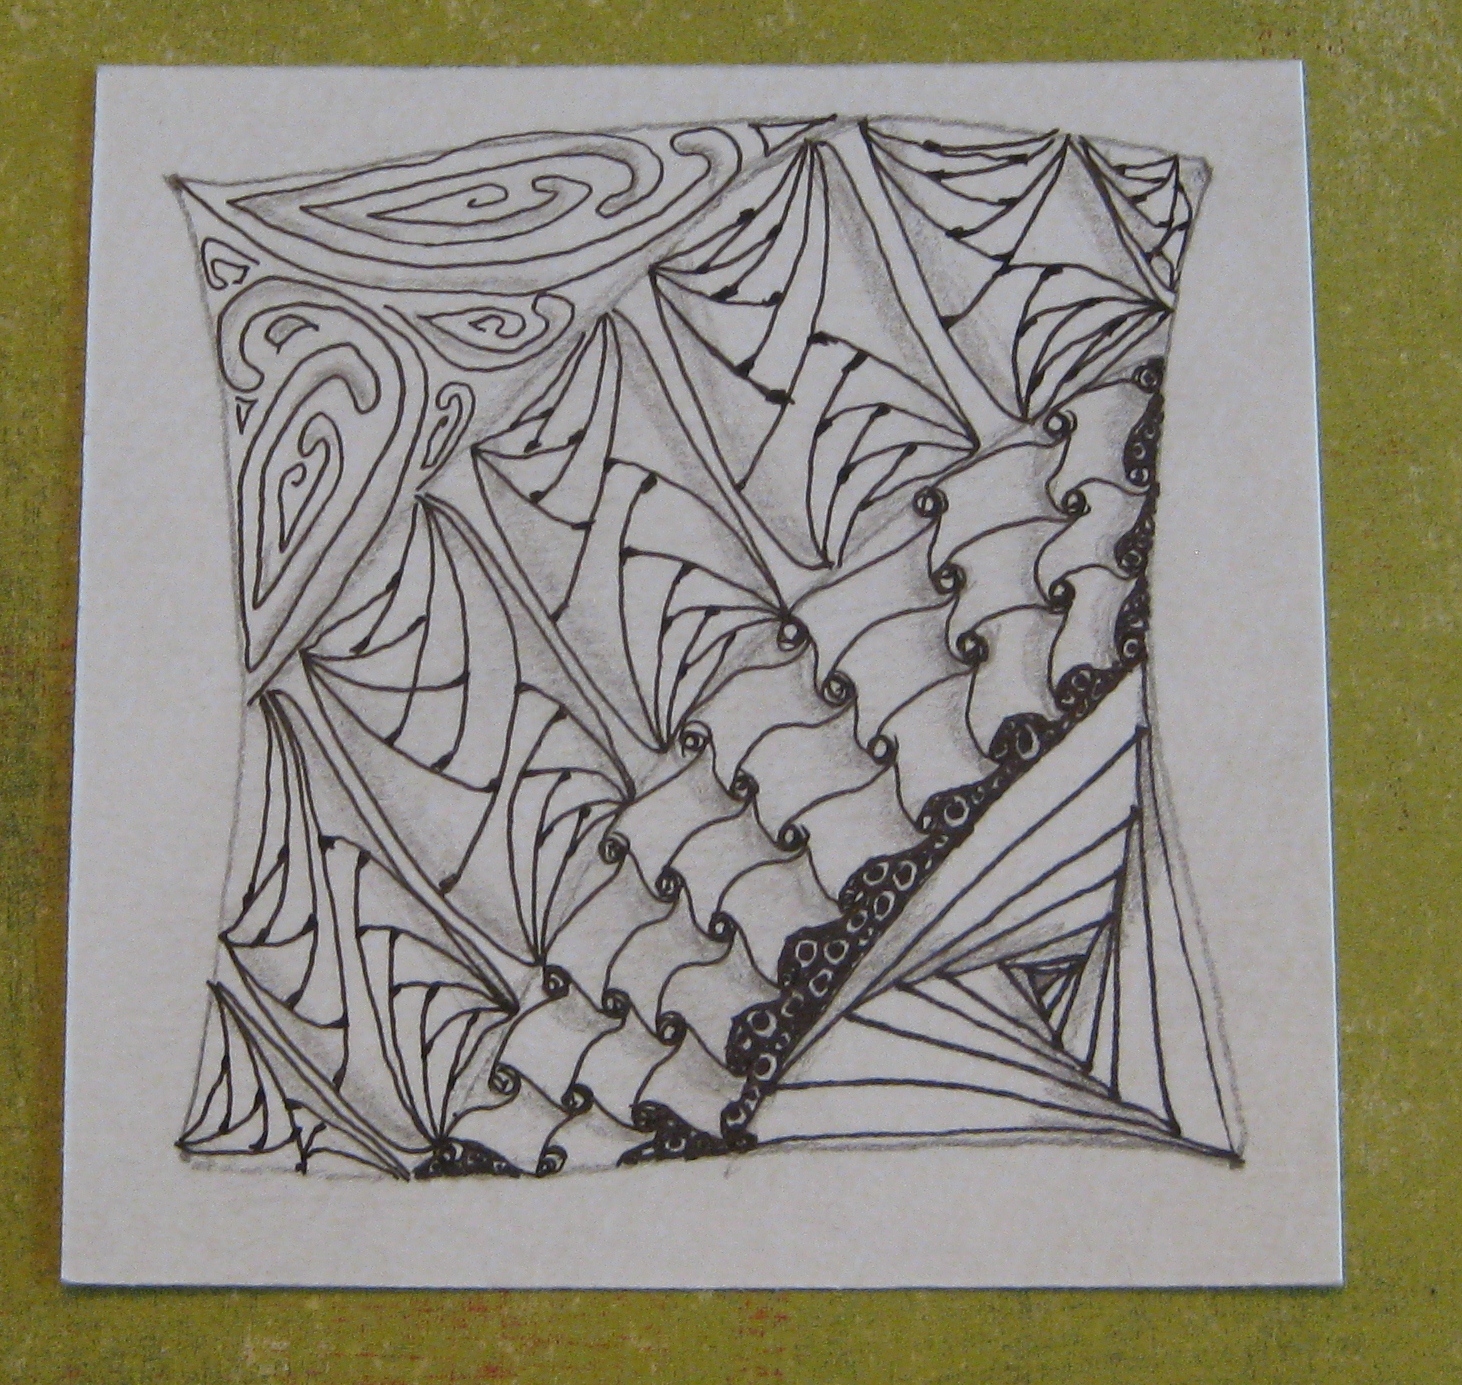
Organic Stamped Zentangle

Here is a picture tutorial of what I did.

1.  Draw your "string" on post it note.  That is my
zentangle tile underneath.


2.  Trim out sections.


3. Mask borders of tile.
Stamp a pattern in one section.


4.  Cover that section back up with the post it piece you
 cut out and remove another section.

5.  Stamp another pattern in this section.   This
section was a challenge because it was so small.
You can see I used the back of a bug stamp.


6.  Cover that section and uncover another.


7.  Stamp another pattern.


8.  Cover the stamped section and uncover another.


9.  Fill the last section with another pattern.  
In this case I used a tree stamp.


10.  Almost done! 


11.  Add a little shading with a #2 pencil and blending stump and 
NOW its done!


These are the stamps I used.  The bug stamp is 
clear so I'm showing the image instead of the stamp.


Supplies

Stamps :   A Bug's Life, Crafty Secrets Clear Art Stamps
                 Aida Cloth, Stampin Up (retired)
                 Tree, from Adorable Park set, Stampin Up
                  Wood grain, All Night Media

Ink :         Versafine Archival in Onyx Black

Paper :      Watercolor, Fabriano, 25% cotton, 72lb cold press (3 1/2in square)

Tools :       Stamp-a-ma-jig
                  Post it notes

Technique :  Zentangle (size, string, and as inspiration)
                     stamping and masking
                     shading

Credits :  Zentangle is a relaxing, meditative art form founded by Rick Roberts and Maria Thomas.    Please check out their web site at zentangle.com for a description of zentangle, glossary of  terms (tile, tangle, string), videos and stunning examples.

 I made this design just as a twist on zentangle, kind of as an exercise and another way to use stamps.  You can stop here.  OR  Maybe you want to take it further?  How about filling in a stamped image with stamped patterns?  It will make you look at your stamps in a new way.  I hope you try it!

October 13 through October 21, 2012 is Stamptoberfest on the Stamping Forum at twopeasinabucket.com.  It's a week of stamping challenges, chats and games by forum members for members.  It's easy to become a member,  so please join us!  This Stamp a Tangle post is part of the challenge I'm sponsoring during Stamptoberfest at twopeas.

Here is a link to the discussion thread for my challenge on the twopeas stamping forum. 
Here is a link to my challenge blog post on twopeas.  I hope you'll participate!

Monday, August 8, 2011

Ok, so now what? How do zentangle and stamping relate?

The conversation on the twopeasinabucket stamping forum was exploring how zentangle could be used with stamping.  There were lots of beautiful examples.   In most cases, an outline image was stamped and the interior was filled with zentangle patterns.  So, I started looking through my stamp collection for a possible image to use.  Instead, I kept noticing patterns in my stamps.  I stamped the following two pieces with the stamp set shown.

  Kind of sloppy water coloring!  I made the picture smaller so you can't look too closely!


I was worried the recipient of this card would wonder why I left a pencil outline, so I went over the original "square" with an 03 microperm pen and emphasized the corner dots.


Stamp Set : Stampendous   April Shower Flowers


The flower outlines with the patterned oval rings and oval shapes reminded me of zentangle designs.  I stamped in the traditional size zentangle "square" (3.5inch square of 140lb watercolor paper with a loosely pencil sketched wavy square inside).  I stamped with archival ink and colored with Tombow markers.  The first example used a watercolor technique.  The second example (already made in to a card) I got bolder color by only using water on the background.   Hmmm, these were ok, but not exactly a zentangle.  What's missing?  Ahhh, the string!  A pencilled in random line that divides the area in to sections to be filled with pattern.  I'll post my next experiment with zentangle and stamping tomorrow.  Thanks for hanging with me so far!  In the meantime, if you haven't checked out the zentangle website, they describe strings and tangles and supplies there. The newsletters are a great way to learn.

Sunday, August 7, 2011

Playing with Zentangle

My first zentangle

I was thinking about taking a zentangle class, and then a conversation started about zentangle on the stamping forum on twopeasinabucket.com.  I decided to go ahead and try it myself first to see if I would enjoy it.   I read up on the subject at www.zentangle.com .  They say, "With Zentangle, anyone can create beautiful images from repetitive patterns."  It is fun and relaxing!  And I don't even pretend to know how to draw.  That's why I like rubber stamping so much; the drawing is already done for me.  But zentangle is a series of repetitive strokes, easy strokes!  The zentangle above is my first attempt.  I learned the patterns from the zentangle website.  I looked under their Newsletters tab and a few of the patterns actually had video demonstrations.  Tips on shading were particularly helpful!  The patterns (or tangles) I used above from top left to bottom right are mooka, betweed, cadent, (un-named filler of circles/dots), and paradox.  I think I will definitely try this again!  I hope you'll give it a try too.  There is lots of good information at the zentangle website linked above.

Monday, July 19, 2010

Retake on Thinking Inking Week Two - embossing Take Two


Rubber Stamp : Stampin Up Print Pattern (harlequin), Deadbeat Designs (Life ...)
Distress Embossing Powder : Tattered Rose
Distress Inks : Pumice Stone, Victorian Velvet, Worn lipstick, Old Paper
Paper : Tim Holtz Paper Stash Lost and Found (pig card was cut from a sheet in this pad)

I continued to play with embossing this week. I sponged with Pumice Stone Distress ink. Stamped SU Printed Pattern (Harlequin) with Victorian Velvet Distress ink and Embossed with Tattered Rose Distress embossing powder. I stamped Life is Good with Pumice Stone twice to help it show up a little better, and embossed with clear EP. The edges were inked direct to paper with Worn Lipstick to brighten it up a little. The embellishment was cut from Tim Holtz' Paper Stash, Lost and Found pad. I put 3 coats of UTEE on it, then stuck it in the freezer for a few minutes and crackled it. I rubbed it with Old Paper distress ink and adhered with redline tape. Thanks for looking!

Whew!  I think I'm finally just about caught up posting my latest stamping projects.

Retake on Thinking Inking - Week Two Swap Tags

To find out more about the Retake on Thinking Inking, check out this post.  Week two is all about embossing.  Embossing in general, using multiple colors of embossing powders, distress embossing powder, UTEE (ultra thick embossing enamel) ... 

Here are the tags I made.  One to swap one to keep.


Rubber Stamps : Stampin Up Printed Pattern (harlequin background), Rubber Stampede (Gerbera Daisy)
Distress Inks : Shabby Shutters and Peeled Paint
Embossing Powders : Stampendous PEARLustre in Garnet and Champagne

Technique :
  • Blended distress inks on with foam applicator
  • Waterstamped background (inked with Versamark, then spritzed with water and stamped)
  • Dried with heat gun and rubbed with embossing bag (so powder wouldn't stick anywhere except where I wanted it.)
  • Stamped flower with versamark, sprinkled with embossing powders and heated.
  • Inked edge by applying the distress ink pad direct to paper.
The cool thing about the distress inks is that they react with water, so stamping with a wet rubber stamp lightens the stamped areas.  Something I learned about embossing powder is not to overheat!  The first flower I stamped on another tag seeped in to the tag until it was no longer embossed.  I was left with a flat gold flower.
 

Sunday, July 18, 2010

Retake on Thinking Inking Week 1 - Continued just for fun

Week one of Thinking Inking covered Distress Inks.  I wanted more play time so I made a few more tags just for fun.


Rubber Stamps : Stampendous (Pua Tapa border) , Sarasota Stamps (Hi - Florida Palm), Stampabilities   (Paradise postage), Viva Las Vegastamps (water skier)
Distress Inks : Tumbled Glass and Weathered Wood
Versafine : Onyx black
Archival : black (lighter skier, that ink pad was a little dry so I switched to Versafine for the others) 
Perfect Pearls : turquoise


Technique : 
  • First two tags left to right - inked up a craft sheet with tumbled glass distress ink, sprinkled with a little perfect pearls, spritzed with water and then mopped the color up with the tag.  Third tag - applied ink with a blending sponge.
  • Stamped border with distress ink.
  • Stamped water skier with black ink.
  • Used a marker to color just a portion of the Florida Palm stamp.
  • Paradise postage stamped with Weathered Wood distress ink.
I sent one tag along with my bubble girl swap tag.  I sent another tag with a little package in thanks for a gift certificate I won.  I'm putting the last tag with my collection of Technique tags.  Thanks for visiting!

Retake on Thinking Inking Week 1 - Distress Inks

One of my favorite websites to hang out on is www.twopeasinabucket.com.  The Stamping Forum is re-visiting the Thinking Inking videos that Jennifer McGuire presented last summer.  There are 3 videos per week demonstrating techniques using Ranger and Hero Arts products.  Jan is spearheading the effort on her twopeas blog and in the Stamping Forum.  We're encouraged to make two tags using a technique of the week.  We keep one tag and swap the other.  Can't wait to get my first tag.  It's coming from Belgium!  My tag went to Maine.

Week 1 covered Ranger Distress Inks.  

My swap tags :


Rubber stamp : Stamp Camp (Bubble girl)
Distress Inks : Peeled Paint, Pumice Stone, Tumbled Glass
Versafine Ink : Onyx black
Perfect Pearls : turqoise
Other : Gelly roll, clear glaze pen on stamped bubbles


Technique :
  • Blended on inks with a foam applicator.
  • flicked on water with a brush that had a little perfect pearls in it.
  • Stamped bubble girl with Versafine Onyx Black.
  • Went over stamped bubbles with a clear glaze pen.
I hope my recipient likes her tag!  All the tags submitted were really wonderful!